Installing Ubuntu 20.04 Focal On the Clevo NH57AF1 aka XMG Apex 15 Ryzen / Forge 15r
TLDR; Ubuntu runs great on the 3900X + nVidia GTX 2070 combo, but you need to make a few tweaks to the installation process as well as do some quality of life fixes post-installation.
Installation
As of this writing, the Ubuntu 20.04 Focal live cd installer doesn’t seem to like the nVidia 2070 mobile GPU so you’d need to do the nomodeset trick:
- During the text menu where you’re asked to Install Ubuntu, press
e - Move the cursor (note: the keyboard won’t be very responsive) to the last character of the linux boot arguments and add
nomodeset - Press F10 to save the settings and continue booting
Adding nomodeset here will allow the installation to continue. However, it will not install the nVidia drivers so everytime you reboot you’ll still need to do the nomodeset trick. In order to avoid that:
- Boot into Ubuntu (use the
nomodesettrick) sudo apt install nvidia-driver-440- Reboot
Firefox hardware acceleration
When using Firefox, you’ll notice that using the mouse wheel to scroll web pages up and down is excruciatingly slow. It looks like hardware acceleration is disabled by default during the installation. To enable it:
- Launch firefox and go to
about:config - Look for
layers.acceleration.force-enabledand set it to true - Restart Firefox
Noise Levels
The NH57AF1 can be quite noisy if all you want to do is watch some videos after work. I use mine as a desktop replacement so it’s already a meter away from my ears, but I can still hear it when it tries to cool down the 3900X desktop processor. One easy way of controlling the noise levels is installing the Gnome cpufreq extension.
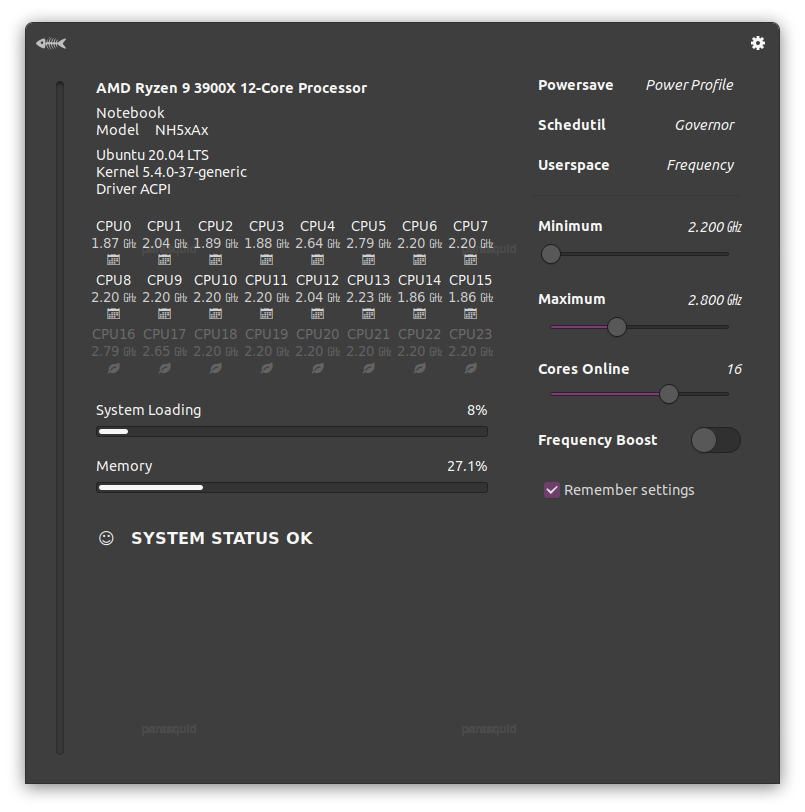 I personally switch to the powersave mode which disables four out of the twelve cores (eight out of the twenty-four threads), limits the maximum frequency to 2.8GHz, and disables power boost.
I don’t use the powersave mode to preserve battery life; in fact I run the machine without the battery installed since I use it as a desktop replacement (the battery will last longer if it’s not always being charged). I use powersave mode so the CPU doesn’t run as hot, which means the fans won’t turn on as frequently and as loudly as before. The machine is still quite powerful for normal everyday tasks, and when I need the power (such as during app development work) I can easily just switch to performance mode.
Memory and Temperature Indicators
The downside of having a powerful computer is that you never realize that you’re running out of resources. I originally had my machine at just 16GB of ram, and everything runs smooth until the whole system suddenly becomes very slow; my firefox and chrome tabs have eaten up all available memory (including swap).
I’ve since upgraded to 32GB of ram, but I’d still want to be able to monitor my memory (and ideally temperature) levels. The psensor extension is quite useful for that. I’ve found that the system idles at around 60c in powersave and around 75c in performance mode.
It also has some monitors for my Kingston SATA SSD but the temperature reading is wrong. To properly get the SSD temperature, you can use sudo hddtemp /dev/sda (you may need to apt install hddtemp first).
Enable G-SYNC on a FreeSync Monitor
I have a 21:9 widescreen monitor that supports free sync. You can enable G-SYNC on the monitor through display port (G-SYNC for Free Sync doesn’t work for HDMI) by going through the nVidia X Server Settings.
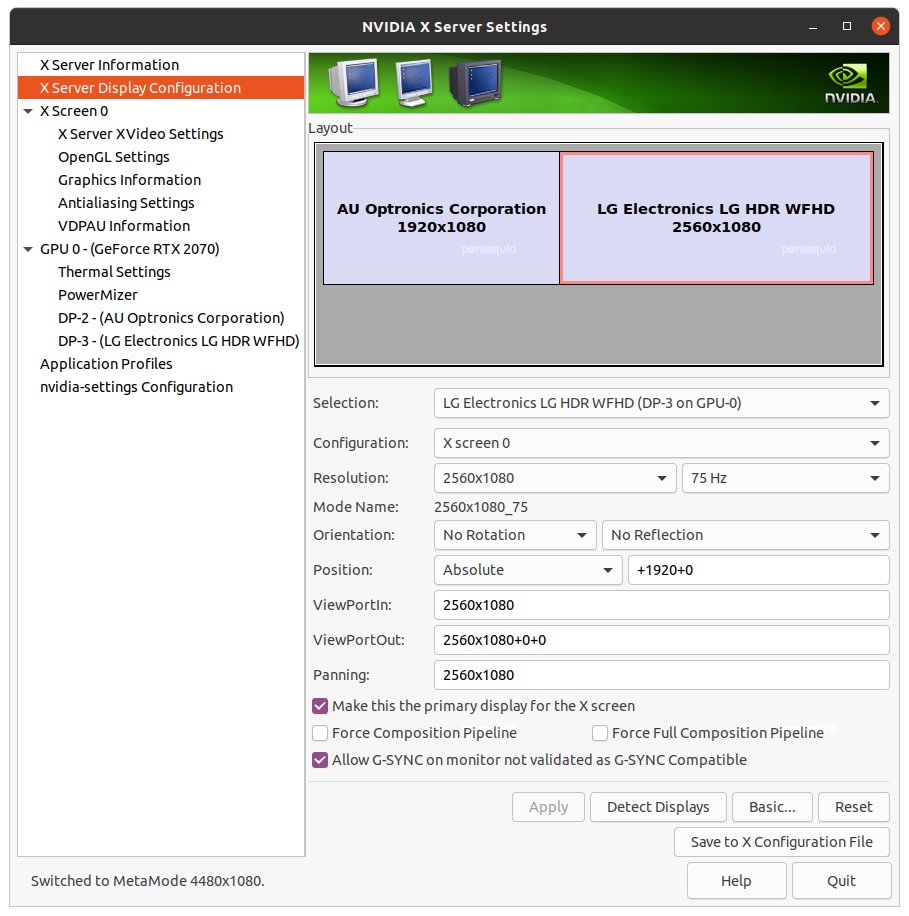 If the monitor supports Free Sync and is on the DisplayPort you’ll see a checkbox that allows you to enable G-SYNC on the monitor.
Some Disk Benchmarks
The disk io on the machine is quite good. I’ve done some disk benchmarks and present them below. Note that for the M.2 drives, one of the drives (the one without the wifi6 adapter) is only PCIe2.0x4 unlike PCIe3x4 on the other one.
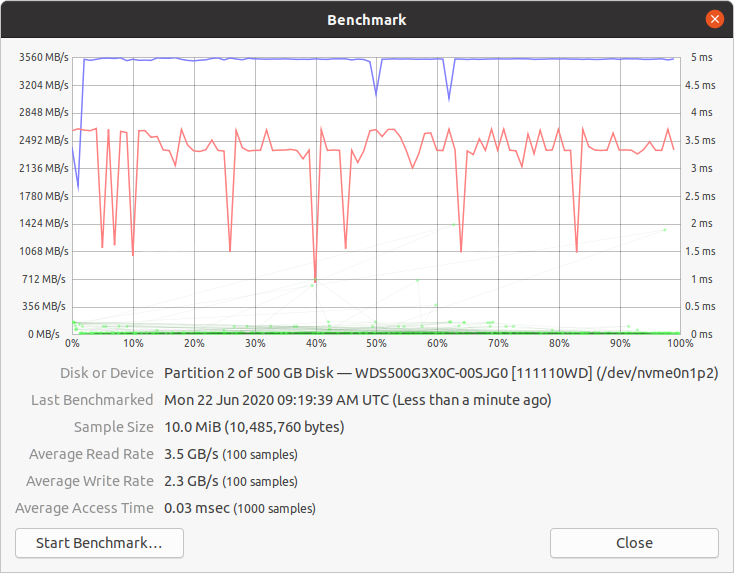 Western Digital Black. Read and write speeds are quite good for this drive
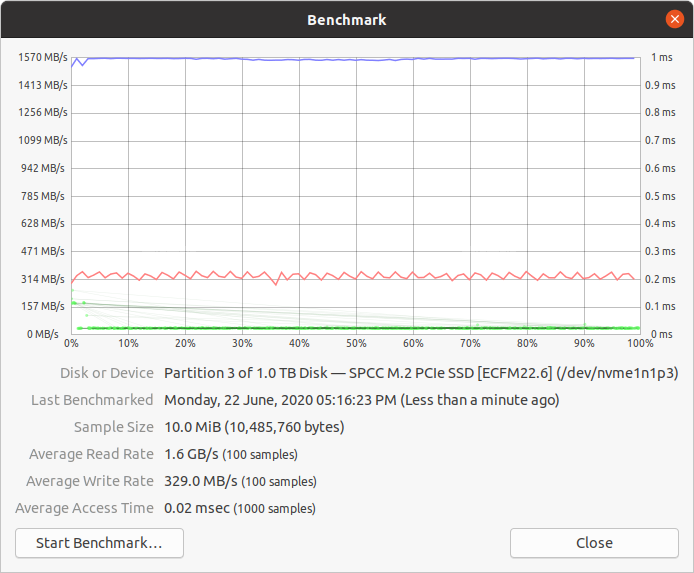 Silicon Power A80. This drive is on the PCIe2.0x4 slot, which halves the access speeds. I also have my Windows 10 partition here (formatted in NTFS) which might explain the slower write speeds.
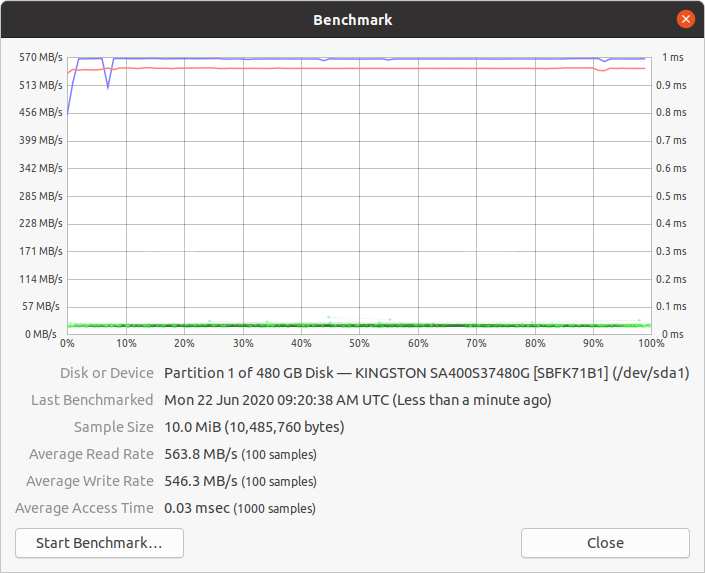 Kingston SATA SSD. The machine also has a SATA slot; it might have been meant for bulk storage (like spinning HDD) but I opted to put an SSD instead for relatively faster access times.
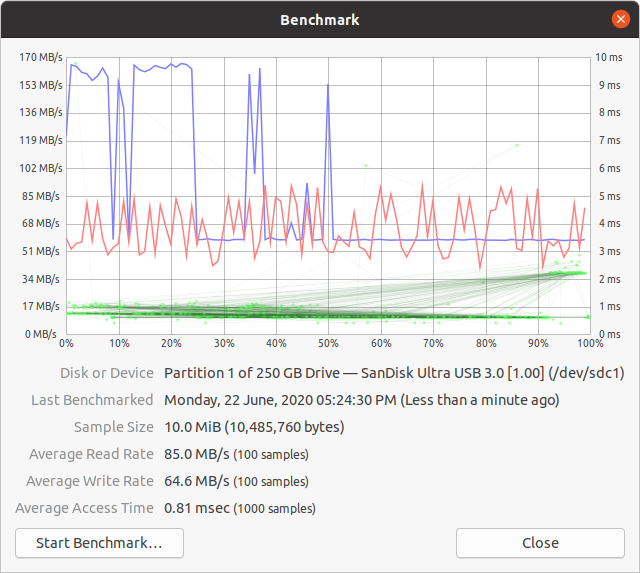 SanDisk USB 3.0 thumbdrive. USB 3.0 is also quite good.
Conclusion
It’s a great machine for my app development work. Until now I’ve been using either the m720q or the P650RS-G for my work-from-home arrangement, but upgrading to this makes everything so much faster.