DIY Presentation Clicker using BLE and Espruino Mk-1
I had a spare nrf52832 UART module lying around and since the lockdown happened, I’ve been itching to do something with it. So why not a presentation clicker to prepare for when I get to do in-person meetups again?
 Kinda something like this, but more steam-punky
First, I had to deal with the 2mm pitch of the castellated edges that the chip had. I wanted to eventually use the output not just as a clicker but also as a discovery board, so I wanted to put it in a small protoboard.
At this point I also didn’t have the full design in my mind so I thought I would just wing the construction, which means I needed to breakout all the pins upfront and attach them with pin headers so I can make connections as needed.
I read up on an interesting construction technique at hackaday as well as dead bug style wiring, and I thought this would be just perfect for the task at hand.
 Although in this case, it doesn’t look as much as a dead bug since the “legs” actually touch down.
I then added a few more components: power supply (via usb or LiPo), regulators (the nrf52832 runs on 3.3v so it needs to be regulated down), as well as various buttons and LEDs.
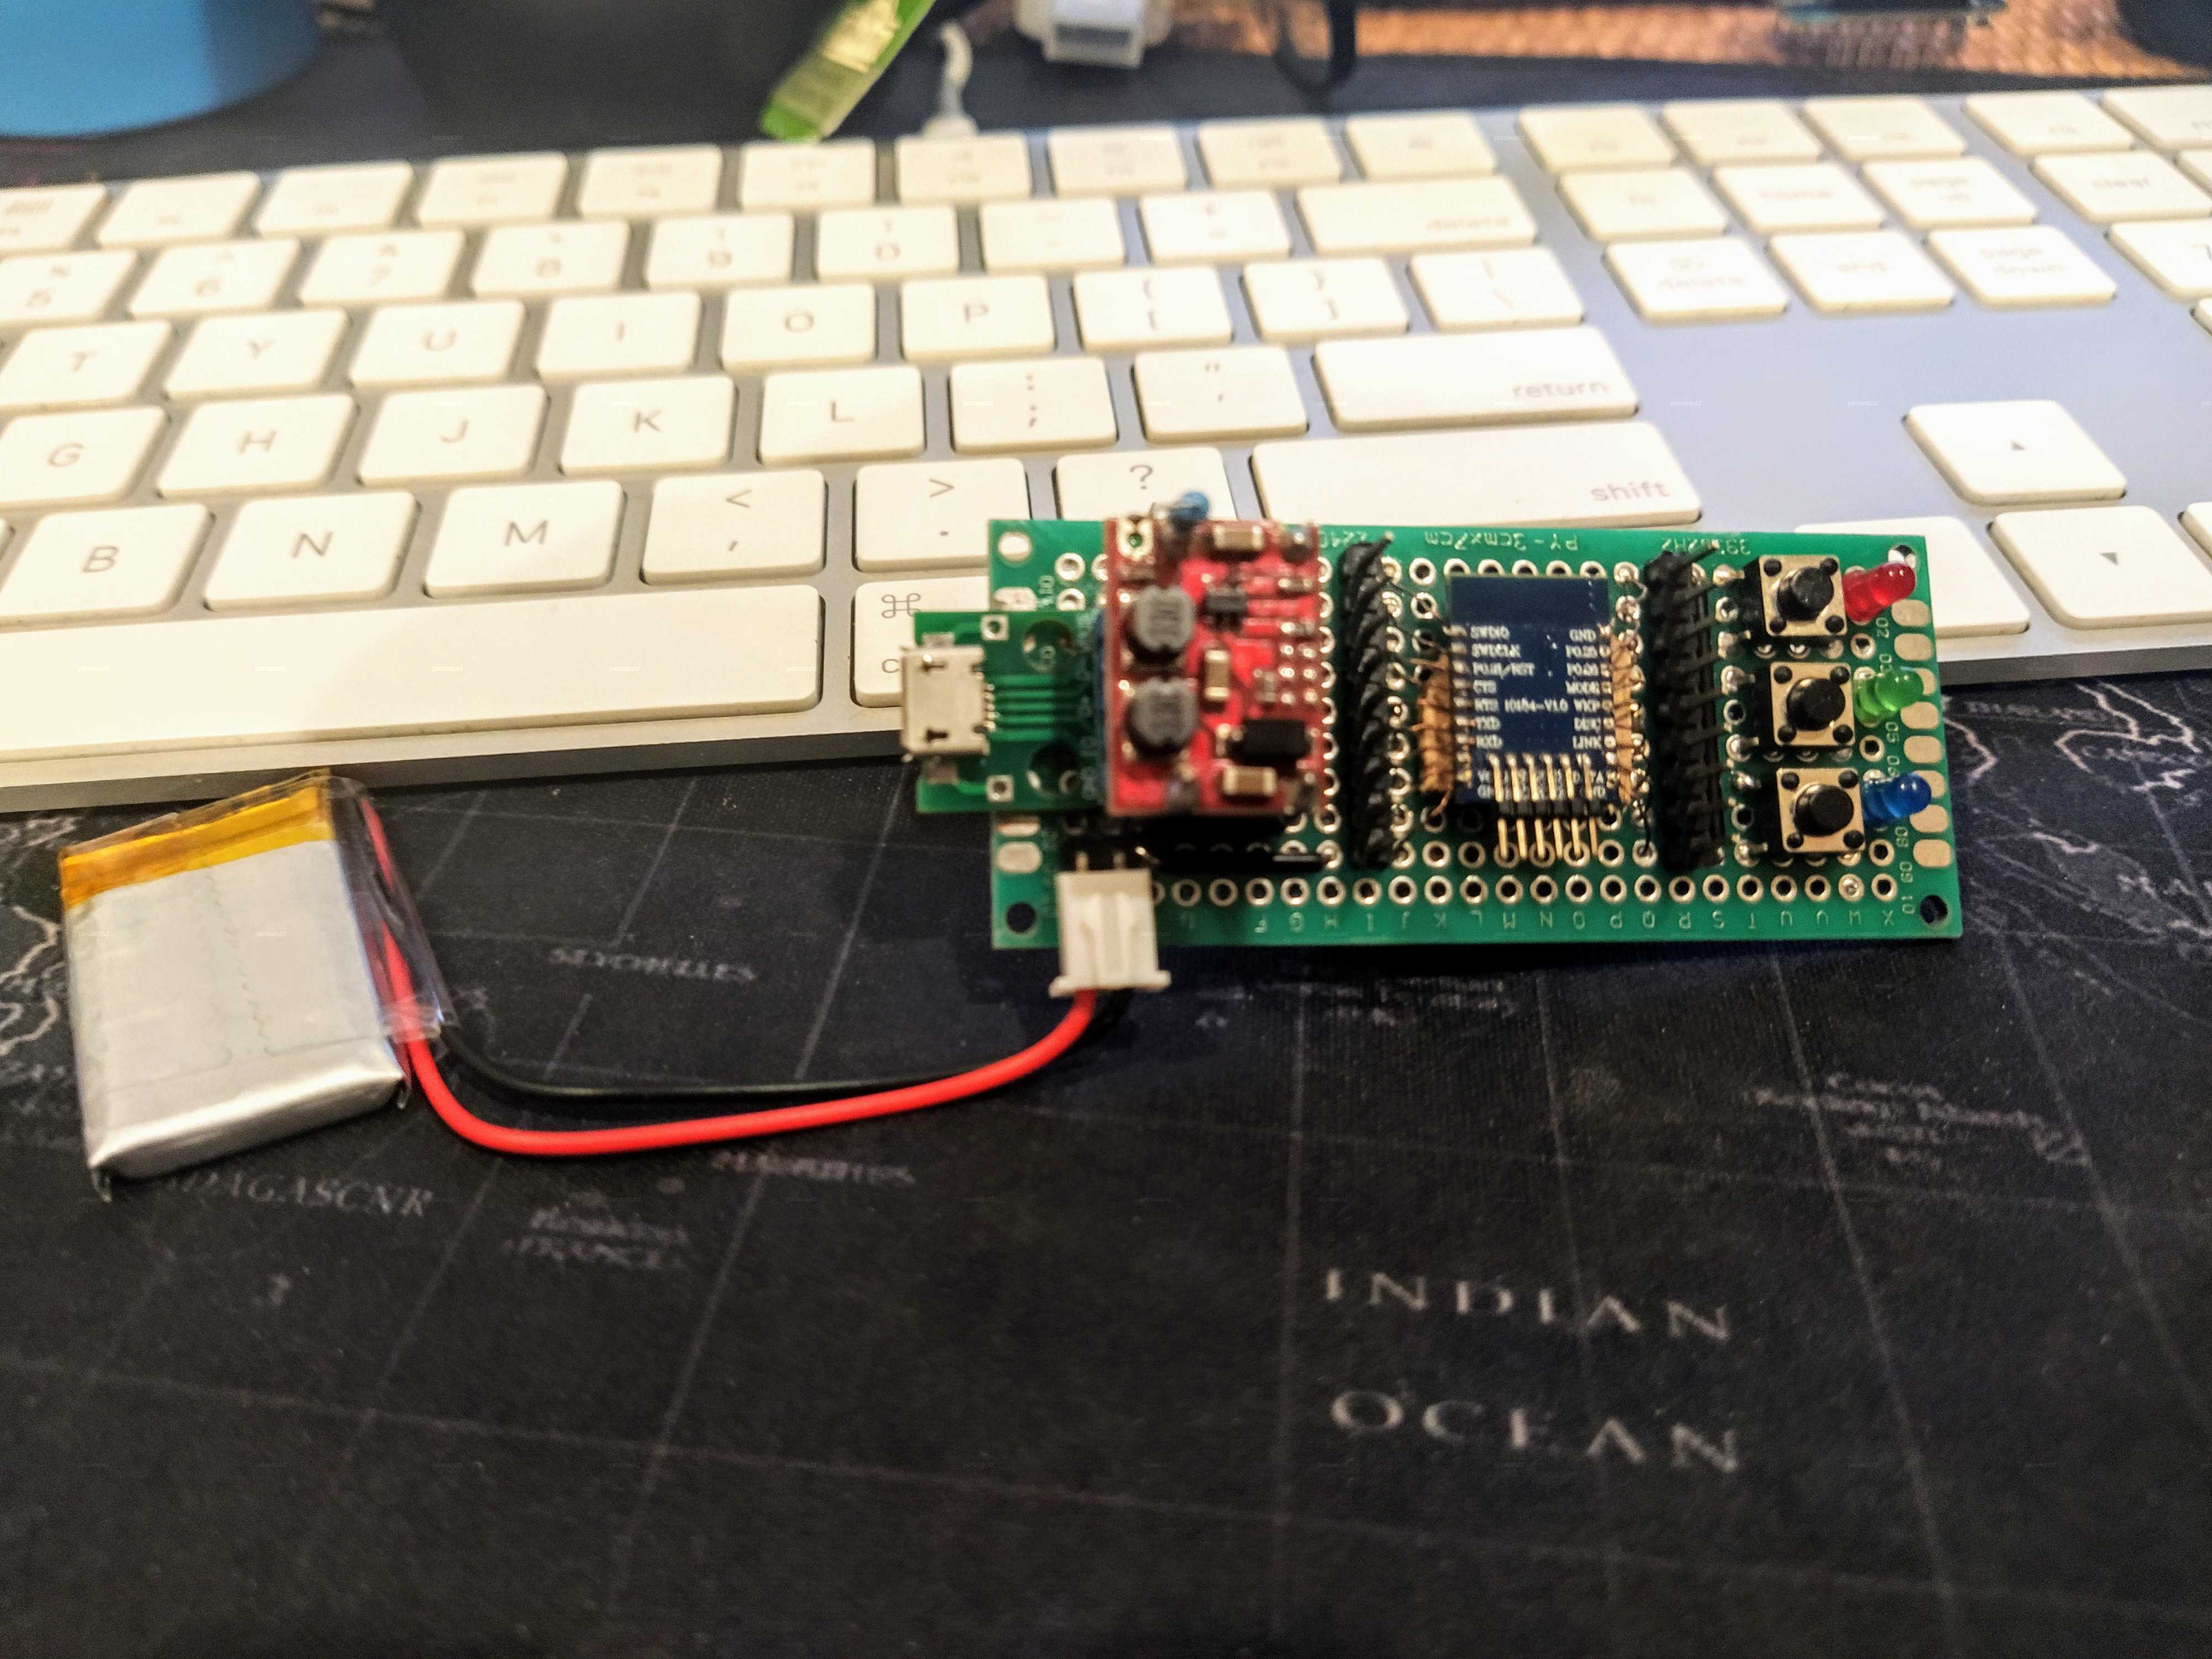 I did most of the wiring on the underside. It’s NOT a pretty sight :P There’s also a coin cell holder at the back for cases when I don’t want a LiPo battery hanging out.
Next up is the firmware. Back when I was playing around with the idea of making my own clicker, I had wanted to use the attiny85 and Arduino to write it. Some (non-updated) code can still be found here: https://github.com/parasquid/mcu-iot-sensors/blob/master/clicker/src/main.cpp
Suffice to say, that project hasn’t seen progress:
- It required two kinds of firmware: the USB-HID device (which is what the code above does) and the actual clicker (which I never managed to get to) communicating with each other via a wireless link (probably an nrf24l01)
- Programming in Arduino cpp isn’t a walk in the park. Compiling and uploading takes up more time than you would think, especially when all you want is to play around with responses or to change something trivial.
I know I can program the nrf52832 chips with Arduino, but I had second thoughts. I didn’t want to slog through something that I didn’t enjoy and eventually abandon it.
Then I remembered that I backed a kickstarter project called Bangle.js and together with the actual product, the tier I’m at makes me eligible to receive extra rewards such as other BLE-enabled Espruinos. These Espruinos had the same chip as the module I was experimenting with, so I thought “why not?”
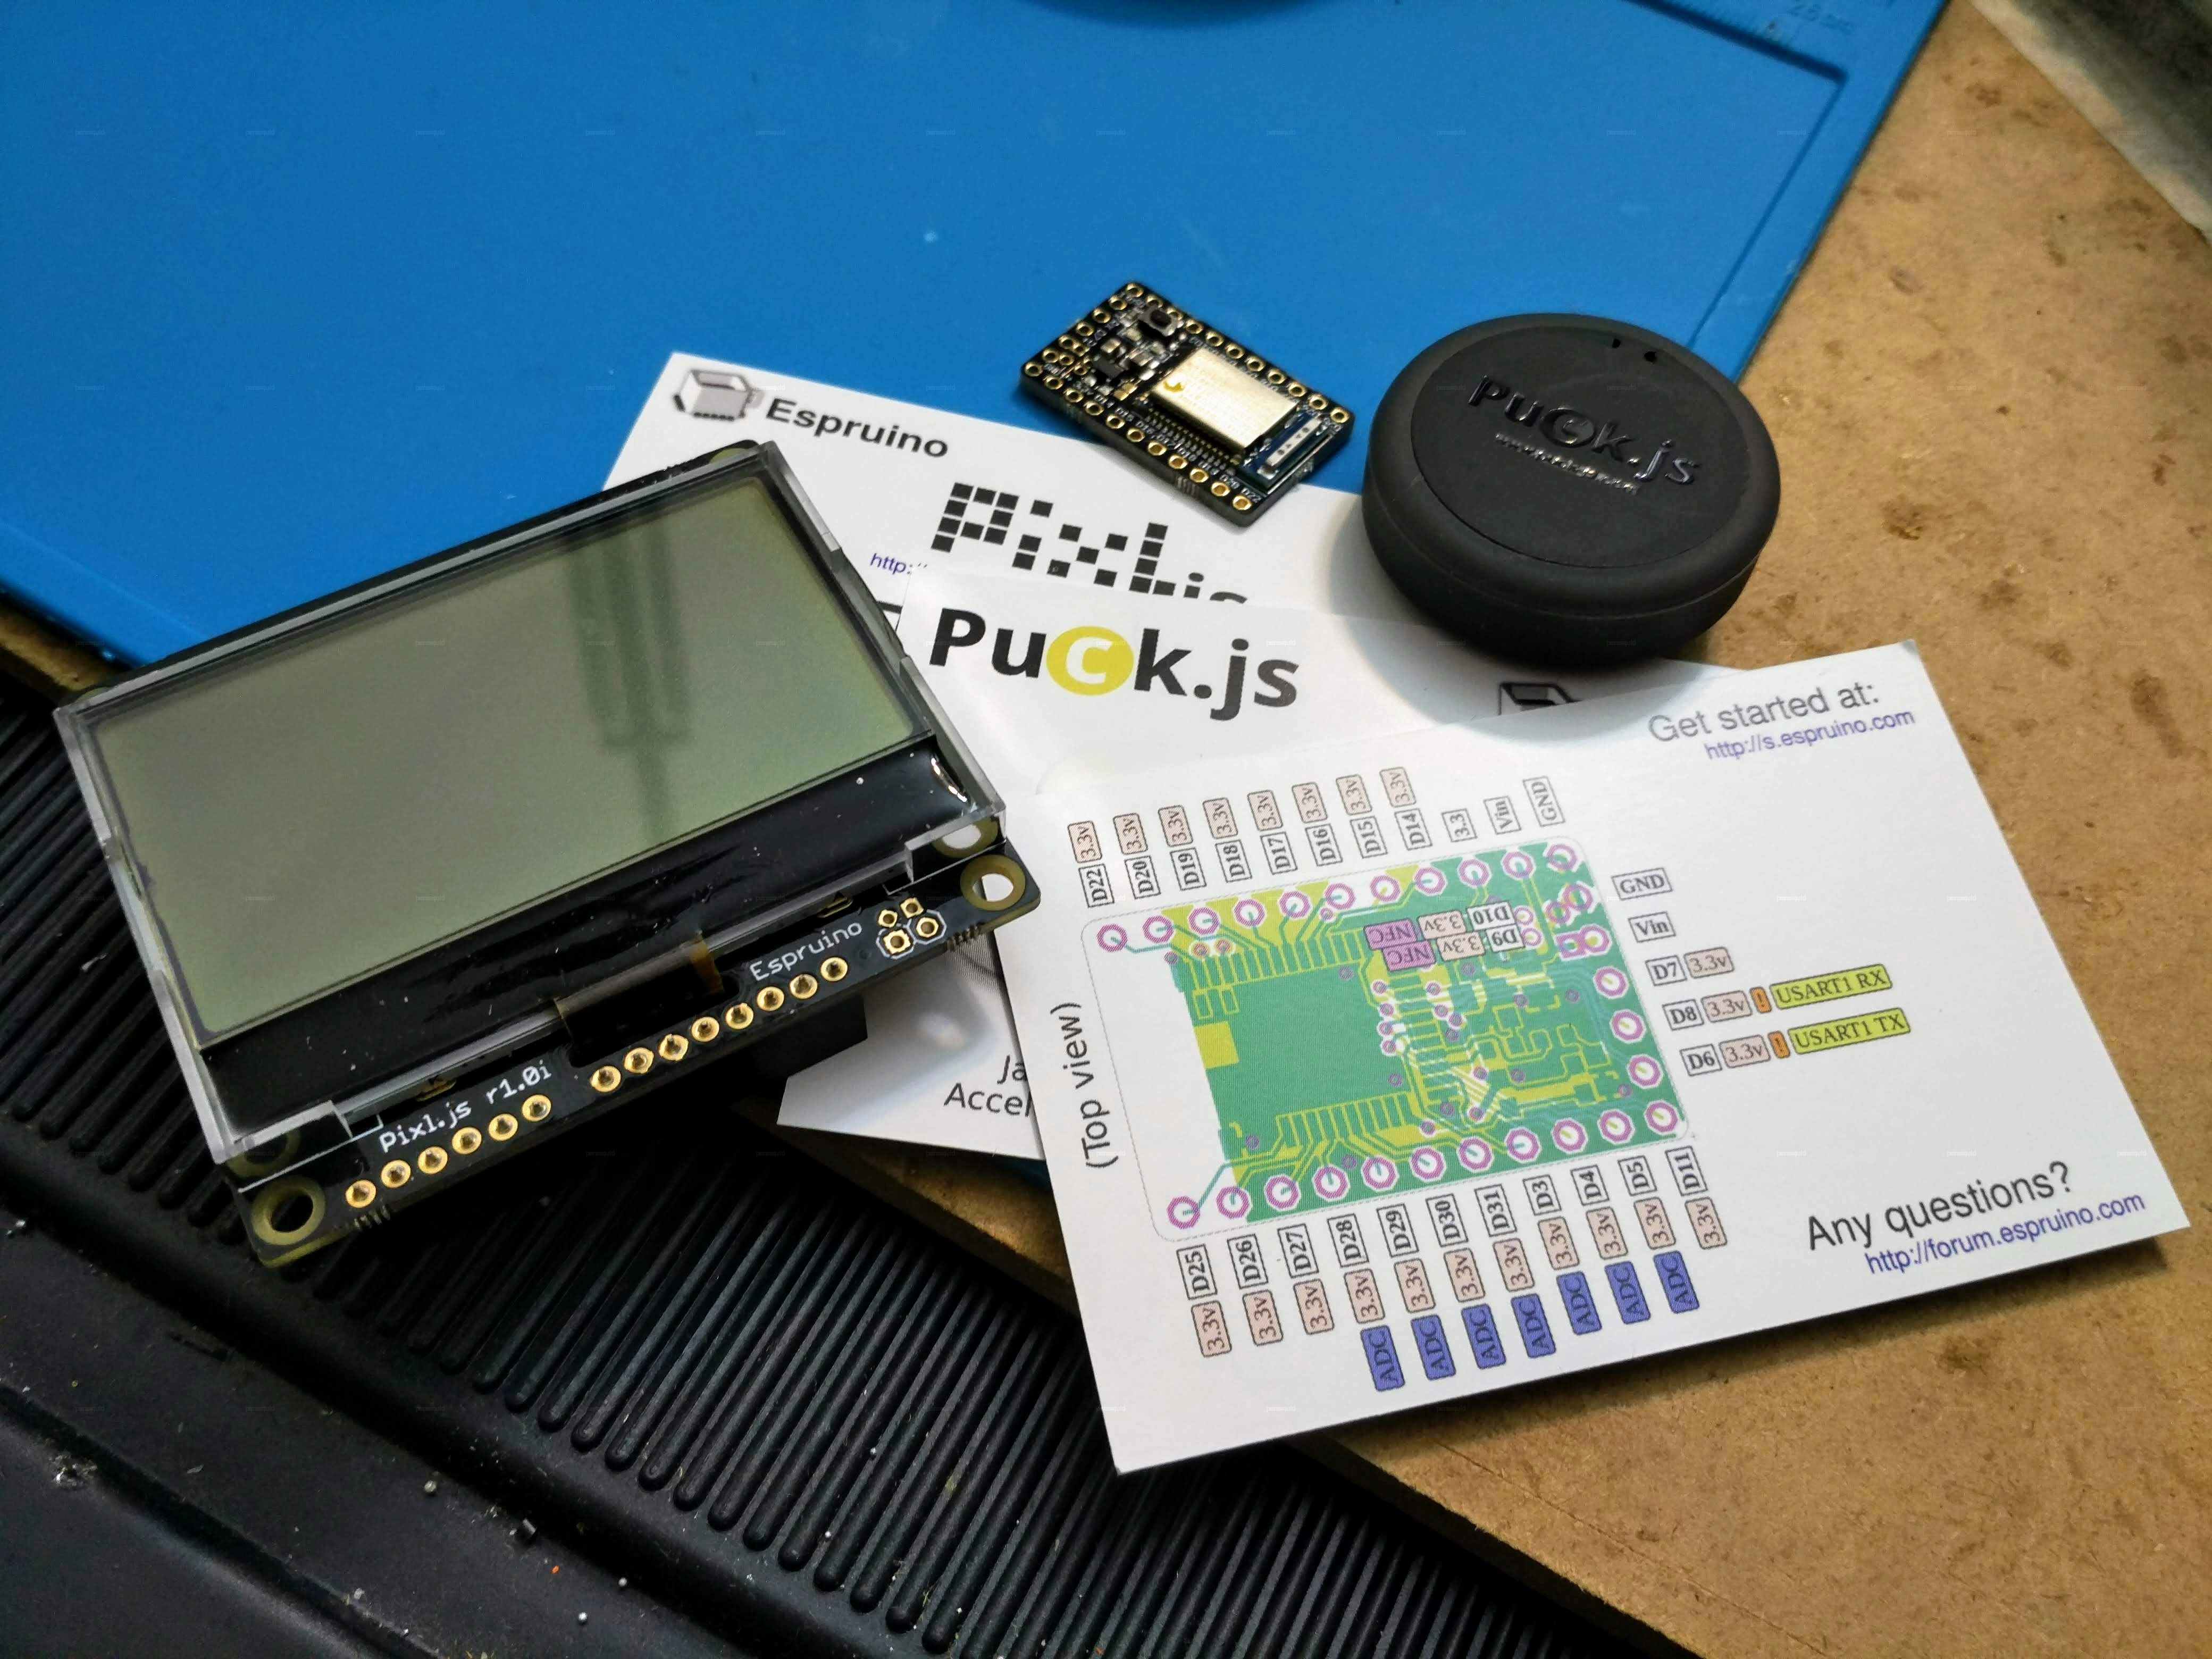 All the Espruinos! (Watch not included)
So I whipped up my Raspberry Pi3B+ and compiled and installed OpenOCD on it to use it as an SWD programmer, and flashed the Espruino MDBT42Q firmware onto the module. After quickly reading up on Bluetooth Low Energy concepts, I played around with the built-in Espruino HID libraries and came up with something:
const LED1 = 25;
const LED2 = 26;
const LED3 = 30;

const BTN1 = 27;
const BTN2 = 28;
const BTN3 = 31;

pinMode(BTN1, "input_pullup");
pinMode(BTN2, "input_pullup");
pinMode(BTN3, "input_pullup");

const ESC = 0x29;
const HOME = 0x4a;
const END = 0x4d;
const RIGHT = 0x4f;
const LEFT = 0x50;
const PERIOD = 0x37;

var kb = require("ble_hid_keyboard");
NRF.setServices(undefined, { hid : kb.report });

function btn1Pressed(e) {
  const timePressed = (e.time - e.lastTime);
  const isLong = timePressed > 0.4;
  console.log(e.time, e.lastTime, timePressed);
  console.log(isLong);
  if(isLong) {
    digitalPulse(LED1, true, 400);
    kb.tap(HOME, 0);
    console.log("btn1 long pressed");
  } else {
    digitalPulse(LED1, true, 50);
    kb.tap(LEFT, 0);
    console.log("btn1 pressed");
  }
}

function btn2Pressed(e) {
  const timePressed = (e.time - e.lastTime);
  const isLong = timePressed > 0.4;
  console.log(e.time, e.lastTime, timePressed);
  console.log(isLong);
  if(isLong) {
    digitalPulse(LED2, true, 400);
    kb.tap(PERIOD, 0);
    console.log("btn2 long pressed");
  } else {
    digitalPulse(LED2, true, 50);
    kb.tap(ESC, 0);
    console.log("btn2 pressed");
  }
}

function btn3Pressed(e) {
  const timePressed = (e.time - e.lastTime);
  const isLong = timePressed > 0.4;
  console.log(e.time, e.lastTime, timePressed);
  console.log(isLong);
  if(isLong) {
    digitalPulse(LED3, true, 400);
    kb.tap(END, 0);
    console.log("btn3 long pressed");
  } else {
    digitalPulse(LED3, true, 50);
    kb.tap(RIGHT, 0);
    console.log("btn3 pressed");
  }
}

// trigger btnPressed whenever the button is pressed
setWatch(btn1Pressed, BTN1, {edge:"rising",repeat:true,debounce:50});
setWatch(btn2Pressed, BTN2, {edge:"rising",repeat:true,debounce:50});
setWatch(btn3Pressed, BTN3, {edge:"rising",repeat:true,debounce:50});
Admittedly, the code can be further refactored and duplication removed, but in the spirit of shipping, I uploaded the code and thus came up with this result:
The keybindings are currently mapped to that of https://revealjs.com/ but the beauty of having a firmware that you actually own (as opposed to, for example, the one inside commercial clickers like the logitech) is you have the freedom to change it however you like–powerpoint, keynote, or even turn on and off the lights in the house (blogpost on that coming soon).
For a Mk-1 prototype, it isn’t bad!
Some things I’d want to improve for the next version:
- More buttons. Three is probably not enough. I can multiplex buttons by discrimimating between short and long presses, but even so six buttons is probably not enough.
- Laser pointer. It would be nice to have some sort of pointing device built-in to the clicker.
- Better construction. The main module is being propped by a piece of wood underneath and the connecting wires are quite thin; this wouldn’t survive in a bag if I’m going to use it in actual presentations.
Affiliate links: