ATTiny85 Programmer
It’s been a while, and I was thinking of revisiting the ATTiny85 chips which I bought a number of back when it was the “in” thing as far as Arduino replacements were concerned.
I had a few things I knew I should be using:
- a ZIF socket (I had a few lying around) so it’s easy to program a chip and then remove it. I didn’t have much luck with IC sockets and I didn’t have the one specifically for the 8-pin chips.
- wire wrap. I initially thought that since I was using a longer ZIF socket than needed, I can also program other chips just by redoing the wire wrap (which would be much easier than desoldering wires) making the programmer quite versatile. The wire wrap actually made it easier for me to wire the ICSP headers because I made a number of mistakes getting the correct pins to be connected to the programmer, it didn’t take a long time to do over the wires until I got it working.
- USBasp. The ATTiny85 had such small ram and flash that having a bootloader isn’t very wise, so having a dedicated programmer would save me the space that a bootloader would have used.
- double pin headers. After programming I might want to hook up the chip to some external devices, so I would like this programmer to double up as a development board too. So the outside row would be where I do the wirewrap, and the inside row would be where I can connect dupont cables to.
After a couple of hours of soldering and wire wrapping, it works!
 One tip I’ve learned through experience is to mark the red line in the ICSP header, just so there is no ambiguity over which side the cable should be.
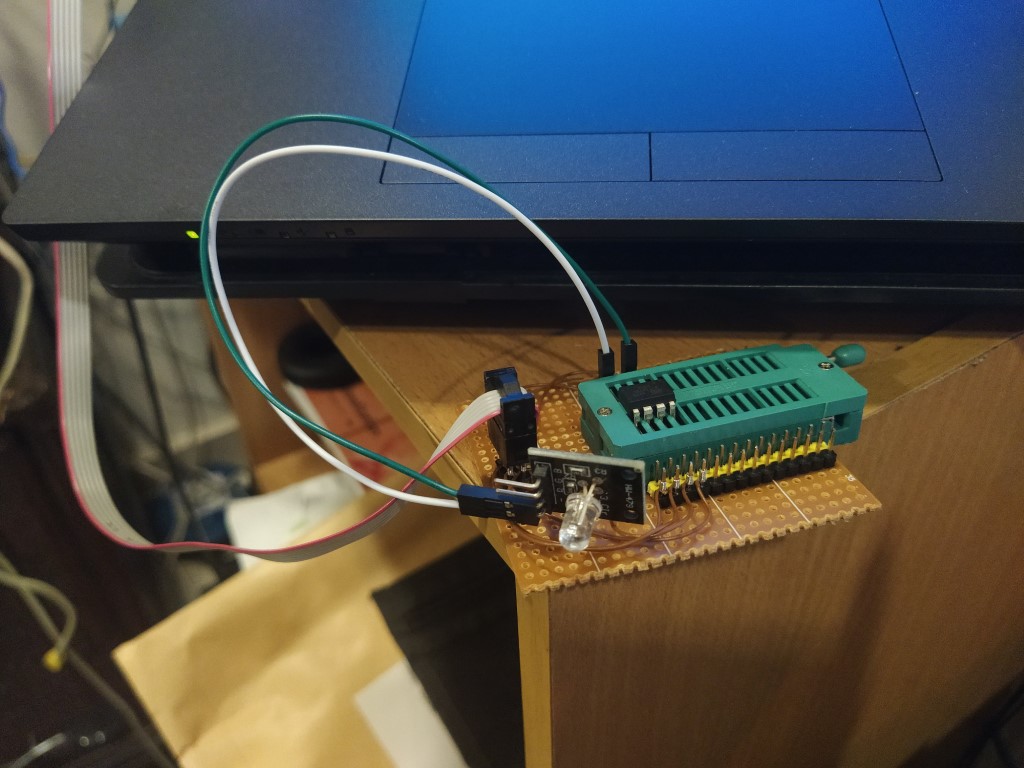
 How do you know when it’s working? When it can run blinky of course :)
this post also appears on https://hackaday.io/project/174219-oneoffs/log/181956-attiny85-programmer